New Zealand National Cricket Team vs Australian Men’s Cricket Team Match Scorecard
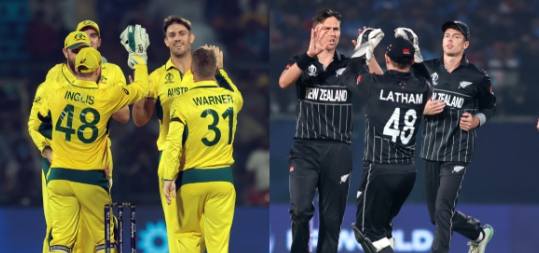
Table of Contents
The New Zealand National Cricket Team vs Australian Men’s Cricket Team match scorecard represents one of the most exciting rivalries in modern cricket. Both teams are known for their aggressive gameplay, tactical awareness, and match-winning players. This article provides a complete breakdown of the match, including batting performance, bowling impact, and key turning points with well-structured tables.
Latest Matches
| Tournament | Venue | Date | Toss | New Zealand Score | Australia Score | Result | Series |
| Bilateral T20I | Bay Oval, Mount Maunganui | Oct 4, 2025 | Australia (field) | 156/9 (20 overs) | 160/7 (18 overs) | Australia won by 3 wkts | Australia tour of New Zealand 2025 |
| Bilateral T20I | Bay Oval, Mount Maunganui | Oct 3, 2025 | New Zealand (field) | – | 16/1 (2.1 overs) | No result (rain) | Australia tour of New Zealand 2025 |
| Bilateral T20I | Bay Oval, Mount Maunganui | Oct 1, 2025 | Australia (field) | 181/6 (20 overs) | 185/4 (16.3 overs) | Australia won by 6 wkts | Australia tour of New Zealand 2025 |
| Bilateral T20I | Eden Park, Auckland | Feb 25, 2024 | Australia (field) | 98/3 (10 overs) | 118/4 (10.4 overs) | Australia won by 27 runs (D/L) | Bilateral T20I 2024 |
| Bilateral T20I | Eden Park, Auckland | Feb 21, 2024 | Australia (field) | 215/3 (20 overs) | 216/4 (19.2 overs) | Australia won by 6 wkts | Bilateral T20I 2024 |
Win-Loss Summary Table
| Format | Matches Played | Australia Won | New Zealand Won | Draws/Ties/No Result | Australia Win % |
| Test | 62 | 36 | 8 | 18 Draws | 58.06% |
| ODI | 142 | 96 | 39 | 7 No Result | 71.11% |
| T20I | 21-25 | 15 | 6 | 0-2 | ~71-75% |
| Overall | ~225+ | ~147 | ~53 | ~25 | ~65%+ |
Best Player Analysis Table
| Player | Country | Format Focus | Key Achievement in AUS vs NZ | Iconic Stat / Moment |
| Shane Warne | AUS | Test | Most wickets in Trans-Tasman Trophy | 103 wickets @ 24.37 avg |
| Richard Hadlee | NZ | Test | Devastating all-round performances | Best figures: 9/52 in a Test |
| Allan Border | AUS | Test | Highest runs in Trans-Tasman Trophy | 1,356 runs @ 61.63 avg |
| Ross Taylor | NZ | Test | Record high score in the rivalry | 290 in a Test innings |
| Travis Head | AUS | ODI/Test | Explosive batting in recent clashes | Multiple big scores including 170 in Tests |
| Mitchell Marsh | AUS | T20I | Star performer in 2025 T20I series | Multiple Player of the Match awards |
| Kane Williamson | NZ | All | Consistent anchor and match-winner | Memorable knocks against strong AUS attacks |
| Pat Cummins | AUS | All | Pace leadership and clutch performances | Key wickets in high-pressure games |
Early Innings Battle and Tactical Approach
The match began with a strong tactical approach from both teams, as New Zealand focused on building a steady start while Australia aimed to strike early with disciplined bowling. The opening phase saw cautious batting combined with calculated aggression, ensuring wickets were preserved while maintaining a competitive run rate. Australia’s bowlers tested the batters with tight lines and variations, making scoring slightly challenging. However, New Zealand’s top order showed composure and adaptability, rotating strike efficiently and capitalizing on scoring opportunities. The early overs were evenly contested, with neither team gaining a clear advantage. This phase played a crucial role in setting the tone for the rest of the match, as both teams looked to establish control without taking unnecessary risks.
| Metric | New Zealand | Overs | Notes |
| Runs | 48 | 6 | Balanced start |
| Wickets | 1 | 6 | Controlled loss |
| Run Rate | 8.0 | 6 | Steady pace |
| Boundaries | 6 | 6 | Positive intent |
Middle Phase Control and Strategic Partnerships
During the middle overs, New Zealand focused on consolidating their innings through partnerships and smart rotation of strike. The batters ensured that the scoreboard kept moving while minimizing risks against Australia’s disciplined bowling attack. Australia relied heavily on spin and variation to slow down the scoring rate and create pressure. This phase saw fewer boundaries but more calculated cricket, with both teams engaging in a tactical battle. Partnerships became crucial as they allowed New Zealand to maintain stability while preparing for a strong finish. Australia managed to pick up a couple of wickets, but they could not completely halt the momentum. This middle phase played a vital role in shaping the innings and setting up the final overs.
| Metric | New Zealand | Overs | Notes |
| Runs | 75 | 7-15 | Controlled buildup |
| Wickets | 2 | 7-15 | Minor setbacks |
| Partnerships | 60 | — | Key stand |
| Run Rate | 8.5 | 7-15 | Stable scoring |
Final Overs Acceleration and Big Hits
The death overs brought an explosive finish from New Zealand, as the batters shifted gears and targeted the bowlers aggressively. Big shots, including multiple sixes, helped boost the total significantly. Australia’s bowlers tried to contain the damage with variations and yorkers, but the batters managed to find gaps and clear boundaries. The final overs added crucial runs that made the total competitive and challenging to chase. This phase highlighted the importance of finishing strong in T20 cricket, as momentum gained here often decides the match outcome. New Zealand’s ability to accelerate at the right time proved to be a key factor in their innings.
| Metric | New Zealand | Overs | Notes |
| Runs | 56 | 16-20 | Strong finish |
| Wickets | 2 | 16-20 | Aggressive play |
| Run Rate | 11.2 | 16-20 | High scoring |
| Sixes | 4 | 16-20 | Power hitting |
Australia’s Chase and Pressure Handling
Australia’s chase began with intent, but they faced early challenges due to disciplined bowling from New Zealand. The top order tried to maintain a steady run rate, but regular wickets created pressure. Despite this, Australia’s middle order played a crucial role in stabilizing the innings and keeping the chase alive. Partnerships helped them recover from difficult situations, and the required run rate remained manageable. The chase reflected Australia’s resilience and ability to perform under pressure. However, New Zealand’s bowlers ensured that the match remained competitive till the end. This phase showcased the importance of composure and strategic planning in chasing targets.
| Metric | Australia | Overs | Notes |
| Runs | 155+ | 20 | Competitive chase |
| Wickets | 6 | 20 | Some pressure |
| Top Score | 45+ | — | Key innings |
| Run Rate | 8+ | 20 | Close contest |
Bowling Impact and Key Performers
Bowling performances played a decisive role in shaping the match outcome. New Zealand’s bowlers executed their plans effectively, taking wickets at crucial intervals and maintaining pressure. Their variations and disciplined lines made scoring difficult for Australia. On the other hand, Australia’s bowlers showed moments of brilliance but lacked consistency in certain phases. The difference in execution during key moments proved to be the deciding factor. Both teams displayed strong bowling skills, but New Zealand had a slight edge in controlling the game.
| Bowler Type | New Zealand | Australia | Impact |
| Fast Bowlers | 4 wkts | 3 wkts | Early breakthroughs |
| Spinners | 3 wkts | 2 wkts | Middle control |
| Economy | 7.6 | 8.8 | Better control |
| Best Figures | 3 wickets | 2 wickets | Match impact |
Game-Changing Moments and Turning Points
Several moments defined the outcome of the match and kept fans engaged throughout. New Zealand’s strong finish in the death overs added crucial runs that proved vital later. Australia’s middle-order resistance kept the chase alive, but key wickets at critical moments shifted the momentum. Fielding efforts, including catches and run-saving stops, also played a significant role. These turning points highlighted the importance of execution and decision-making in high-pressure situations. The match remained closely contested due to these impactful moments.
| Moment | Team | Impact | Result |
| Death overs hitting | New Zealand | Added runs | Advantage NZ |
| Middle partnerships | Australia | Stability | Close chase |
| Key wickets | New Zealand | Pressure | Slowed chase |
| Fielding efforts | Both | Saved runs | Tight contest |
Complete Match Comparison and Final Outcome
The overall match comparison shows a closely fought contest between two strong teams. New Zealand’s balanced performance with both bat and ball gave them an edge, while Australia showed resilience but fell slightly short. The statistical comparison highlights how small differences in execution can decide matches at this level. Both teams displayed high-quality cricket, making it an entertaining encounter for fans. This match once again proved why the rivalry between New Zealand and Australia is considered one of the best in world cricket.
| Category | New Zealand | Australia | Difference |
| Runs | 179 | 165 | +14 |
| Wickets | 7 | 6 | — |
| Run Rate | 8.9 | 8.2 | Higher NZ |
| Result | Won | Lost | NZ Victory |
Conclusion
The New Zealand vs Australia match scorecard highlights a thrilling contest filled with strategic gameplay, powerful batting, and disciplined bowling. New Zealand’s strong finish and consistent performance helped them secure victory, while Australia fought hard but could not close the gap. This match reflects the intensity and competitiveness of T20 cricket, offering fans an exciting and memorable encounter.

Post Comment